|
TCP-Com can be used as a serial splitter cable, that sends data from one physical COM port to Virtual COM ports located on either the same PC, or on multiple IP addresses.
For example, if you have a serial device connected to a physical COM1 on your computer which you wish to share its data with several Virtual COM ports on the same computer, you do the following:
1. Open TCP-Com, and you will see a set of serial communication settings on the left, and a set of TCP/IP communication settings on the right. In the serial communication settings on the left, select the serial communication settings required by your serial device, such as Baud Rate, Parity, Data Bits, and Flow Control.
2. In the TCP/IP Settings on the right, select "This PC will act as a TCP Server". When configured as a server TCP-Com will automaticaly enter the IP address of the PC is is running on, and will also enter a default "Local Port" number of 1000. You can change the local port number to any value not being used by other services, but the default value should be fine. Make a note of both the IP Address and TCP Port values, and click the "Activate" button at the bottom. Below this button the COM status should now say "Open" and the TCP/IP Status should say "Listening".
3. The next step is to select Select "File" > "New", to open a second connection window. In this window select a COM port which does not physically or virtually exist already, such as COM4. and select the checkbox labled "Create Virtual COM port" in the Serial Connection Settings on the left. In the TCP/IP Settings on the right, select "This PC will act as a TCP Client", and enter the same IP Address and TCP port numbers which you noted in Step 2. Finally, click the "Activate" button at the bottom,
4. Repeat everything listed in Step 3, but choose a different COM port each time, such as COM5, COM6, etc. Now you have 2 virtual COM ports which both receive the same serial data from the physical COM1 port. You can continue to repeat Step 3 to create as many virtual COM ports as needed.
6. Now minimize (do not close) TCP-Com, and open your communication applications and configure them to use the virtual COM ports.
If you want the virtual COM ports to exist on different PC's over the network, the same steps 3 through 6 would be taken on each client PC. Then allow any firewall software on all the PC's (including the Windows Firewall) to allow both inbound and outbound access to the TCP Port you specified.
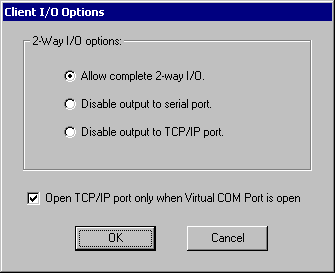
By default, communications will be bi-directional, meaning that the virtual COM ports can not only read the serial data from the physical COM1 device, but they can also send data back to it. Depending on your application, this behavior might confuse your serial device, so you can optionally configure your virtual COM ports to only receive data and not send responses back if needed. This can be done from the "IO Options" setting in TCP-Com.

See
Also:
Welcome to TCP-Com
Common Applications for TCP-Com
Configuring TCP-Com
TCP/IP Client and Server Options
TCP-Com Advanced Options
Using the Ping Tool
Using the Resolve Host Address
Tool
Saving and Loading TCP-Com configuration
files
Password Protecting TCP-Com
Configuring TCP-Com to run as
a Windows Service
Interfacing RS232 Instruments
to a TCP/IP Network
Using TCP-Com to send/receive
data over the Internet
A Very Basic Overview of
TCP/IP Communications
|
