

If you are installing MPNT Server on a machine with Windows XP Service Pack 2 or later (including Windows Server 2003 SP1) you have to configure the Windows Firewall and DCOM settings as described below to allow incoming connections from the MPNT clients.
Windows Firewall Configuration
You can either disable the Windows Firewall completely or configure the firewall to allow inbound communication with the MPNT Server.
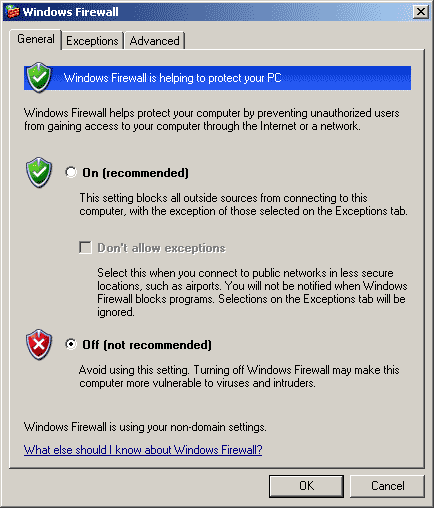
To disable the Windows Firewall completely, do the following:
- Open the Windows Firewall configuration tool from the Control Panel
-
Select the Off option and press the OK button
- Open the Windows Firewall configuration tool from the Control Panel
- Select the Exceptions tab
- Press the Add Program... button
- Press the Browse... button
- Browse to select the SPSRVNT.EXE file (default location is in the C:\Program Files\Spartacom\MPNT\ folder) and press the Open button
- Press the OK button to add SPSRVNT.EXE to the list of exceptions
- Press the Add Port... button
-
Enter a name (for example DCOM137) and UDP port number 137 and click the OK button to add this to the list of exceptions.
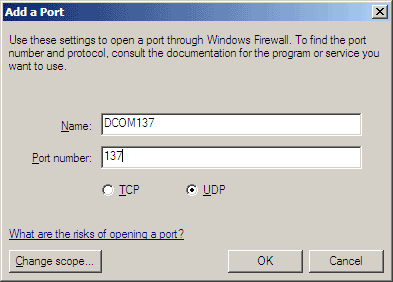
- Repeat Step 8 to also add UDP port 138.
- Repeat Step 8 to also add TCP port
139.
- Press the OK button to
save the Windows Firewall settings. Confirm
that you entered the following exceptions::
UDP Port 137
UDP Port 138
TCP Port 139
DCOM Configuration
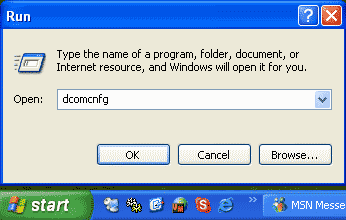
-
Go to the Start menu, select Run..., type dcomcnfg and click the OK button
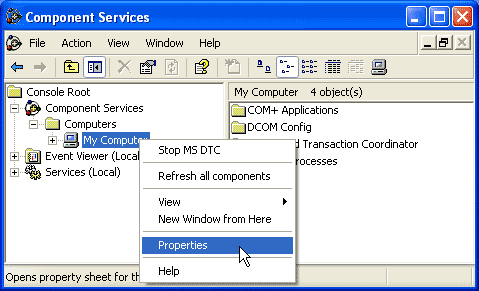
- Click on Component Services to expand it
- Click on Computers under Component Services to expand it
-
Right click on My Computer and select Properties
-
Select the COM Security tab. You now have to edit Limits and Default permissions for Access as well as Launch and Activation as described in the following:
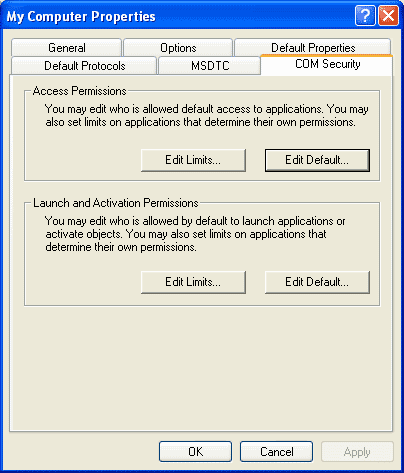
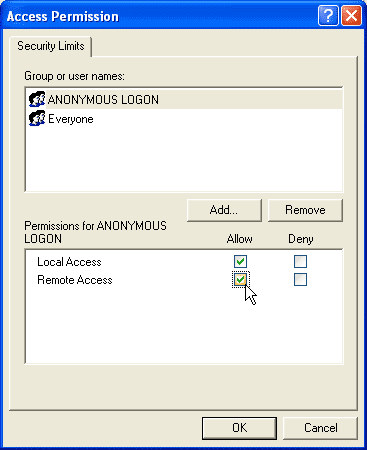
- Press the Edit Limits... button in the Access Permissions section
-
Ensure that the ANONYMOUS LOGON account is given Remote Access permissions and press the OK button
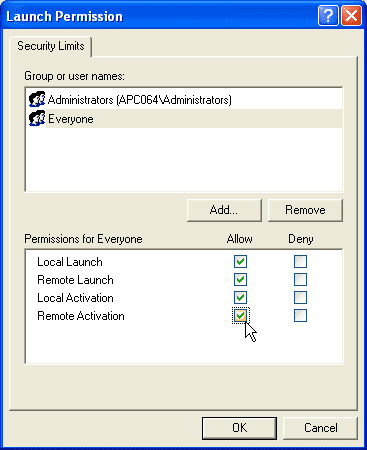
- Press the Edit Limits... button in the launch and Activation Permissions section
-
Ensure that Everyone is given Remote Launch and Remote Activation permissions and press the OK button
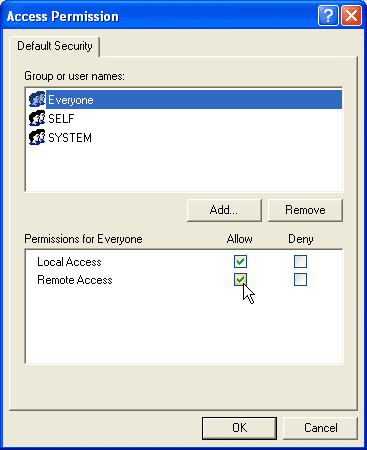
- Press the Edit Default... button in the Access Permissions section
-
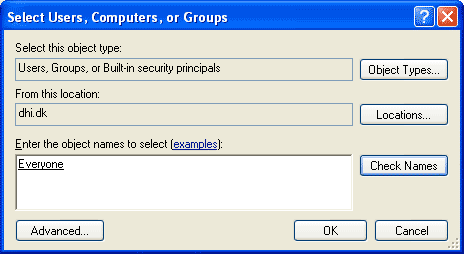
Press the Add... button, add Everyone and press the OK button
NOTE: Alternatively, you could add these permissions to a smaller subset of users than Everyone. One suggested way to accomplish this is to create a group named for example MPNT Users and add relevant users to this group. If this is done then substitute Everyone with MPNT Users everywhere in these configuration dialogs
-
Ensure that Everyone is given Remote Access permissions and press the OK button
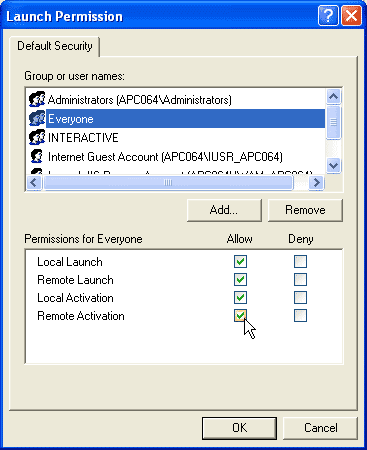
- Press the Edit Default... button in the launch and Activation Permissions section
-
Press the Add... button, add Everyone and press the OK button
-
Ensure that Everyone is given Remote Launch and Remote Activation permissions and press the OK button
- Finish the DCOM configuration by pressing the OK button
- Reboot the machine

