|
Most Dialout Applications use require a modem driver to be
present in order to Dialout, but there are some applications
that do not need a modem driver as they communicate directly
with the Windows COM port. We suggest installing a modem driver
for compatibility with a wide range of applications.
PLEASE NOTE:
If you install a modem driver on the
Modem Sharing client, it is important that it matches the
modem driver on the Modem Server computer exactly.
For example, If the Server uses a manufactures modem driver,
then you should not be using the Windows "Standard 56k
modem" driver on the client, as this will result in a
driver mismatch under some applications, such as Dial-Up Networking.
If you are doing modem pooling then it is important that every
modem within the pool uses the identical modem driver so they
will always match the client end.
Some modem drivers can be installed using their own setup
program, but if the setup program is looking for the modem
to be physically present on the computer it may not complete,
so it is reccomended that the modem driver is installed manually
as shown below.
Go to the Windows Control Panel (click start >
control panel) and locate the "Phone and Modems"
icon. If you are running Windows XP you might need to click
"Switch to Classic View" to locate this. Double
click on the icon to enter the "Phone and Modem Options"
Window. Then click on the "Modems" tab at
the top, and it will show you which modems are currently installed.
Click the "Add" button at the bottom to add
a modem driver.
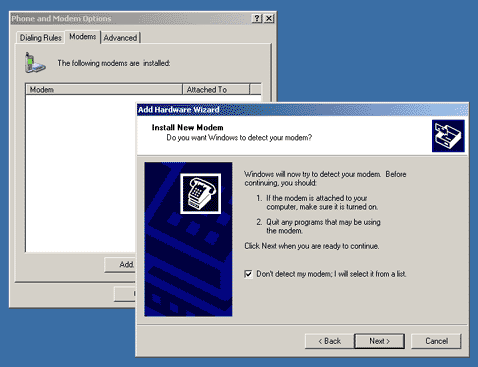
Enable the "Don't detect my modems, I will select it
from a list" checkbox, and then click "Next".
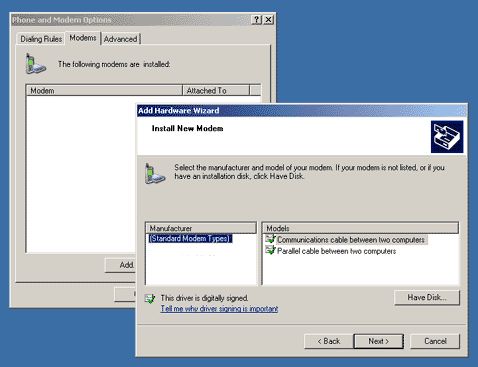
Click the "Have Disk" button. DO NOT CLICK "Next".
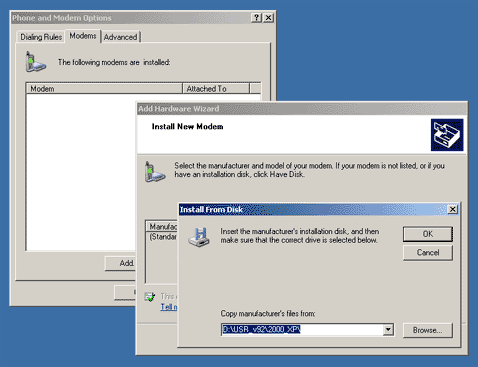
Enter the path to your modem drivers .INF file, either by
typing it and click OK, or Browse for it.
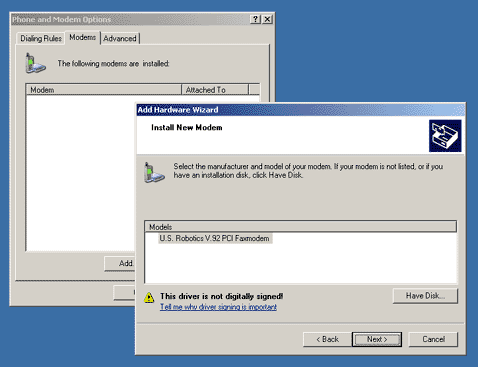
A list of one or more modem models will be displayed. If
there is more then one choice, be sure to select exactly the
same one being used on the Modem Server computer. Click "Next".
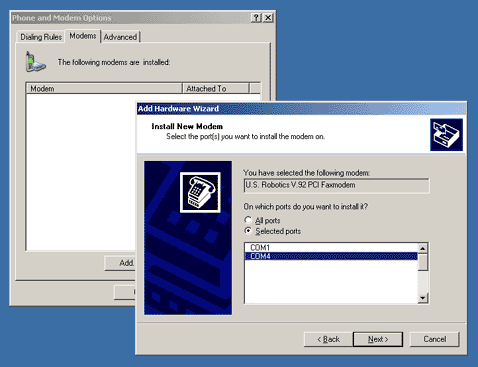
A list of available COM ports is displayed. Click the "Selected
ports" option, and click the virtual COM port which you
selected in the Modem Sharing Client control panel (In this
case it is COM4). Click Next.
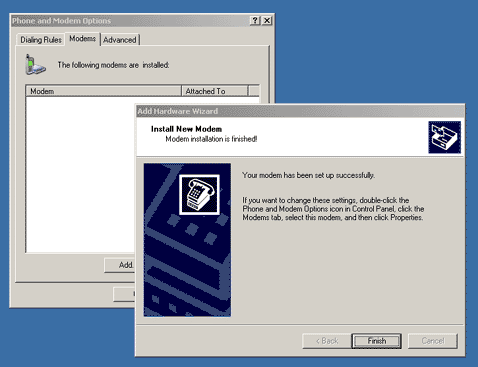
Your modem driver should now be installed. Click "Finish".
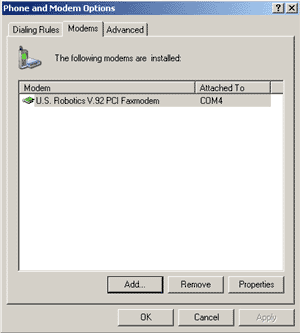
You should now see the modem driver is "Attached To"
the Modem Sharing Client COM port
If no COM port is listed here, then something went wrong with
the modem driver installation.
If the modem driver installed successfully, your installation
is now complete.
This article including screenshots may be reprinted without
permission, in whole or in part. Original author: Brian Turner.
The web site layout is protected by copyright however.
|
