 |
 |
|
https://pcmicro.com/COM1000 |
SimpleComTools, LLC
COM1000 User Manual
SimpleComTools, LLC
11
COM1000 Setup and
Configuration
To make setup and configuration
easy, the COM1000 comes with a MS Windows based Configuration Utility.
This makes getting the device up and
running quick and easy..
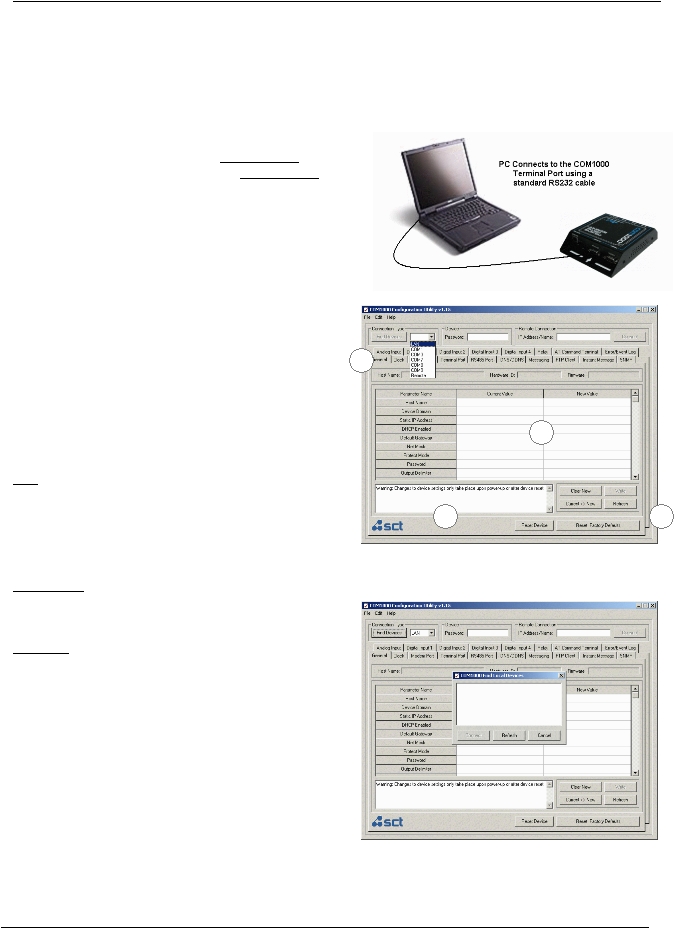
Connection Steps
Step 1:
Connect your PC to the COM1000
Terminal Port using
any standard RS232 serial cable. The
Terminal Port is a
DCE, so there is no need for a null
adapter. Any standard
serial cable will work just fine
.
You may also choose to connect the
COM1000 to an
Ethernet hub or directly to an
Ethernet card via a
crossover cable.
Step 2:
Launch the COM1000 Configuration
Utility. You will see
that the applications is divided
into (4) sections:
1.
Locating/Connecting Devices
2.
Viewing/Editing Settings
3.
Setting Notes
4.
Setting Controls
Step 3:
Locate the device you wan to
configure by selecting the
desired method of communication.
LAN
Any COM1000 located on your Local
Area Network can
be found using this utility. Select
LAN, enter the device
Password, and click on the Find Devices button. You
will see a popup box display the
names of the devices
found on the local network.
Highlight the device you wish to configure, and select Connect.
COM PORT
Selected a COM PORT, click Find Devices and select
your device from the popup
box.
REMOTE
Select REMOTE, enter the device
password, enter the
IP Address or Domain Name, and
select Connect. This
feature can also be used to make a
direct connection to
a device where the IP or name is
known.
Step 4:
Once connected to your device, you
will see a splash
screen, and the application will
load all the parameters
for the device for
display.
Clicking on any of the Parameters
Names. This will
display details for that parameter
in the Notes box.
1
2
3
4